After long break (I got married and had a long honeymoon in the meantime) I´m back with a very easy little project. Took me only a few hours to make something I will enjoy for a long time.
Lately I´ve bought a few T-shirts on sale. They have nice colours, but they are a bit borring, so I decided to make them prettier.
On the light green one I´ve decided to make a colourful applique of butterflies
I used a stencil to make the shape of butterflies in different sizes.
Do you have lots of jeans in your wardrobe? I bet you know you will never wear some of them, because they are out of fashion/ too small/ too big/ not as comfortable as they used to be when you tried them in the shop (ok, maybe it´s just me who do the last one) ....
They just clutter the space in your wardrobe causing your frustration?
If you wish you had some way to use them this is a project for you :)
A denim quilt like this one...
It´s not so difficult, even if it looks like it. Believe me or not, I´ve never made a quilt before.
The only thing you need is about 7 pairs of jeans, contrasting materials (I used beige and light blue cos these are the colours of our living room) and LOTS of time - if you want to sew everything by hand like me, or less time if you plan to use the machine.
The first and most important part is planning.
OK, OK it´s not the best quality sketching, but it did the job.
I´ve decided that I want to have the back pockets in the middle, so first I had to measure all the pockets (in different pairs of jeans they are different size, so make sure you take the larger ones as a base).
My largest ones were 16cm, so the middle squares are this size. 4 squares in the corners are 8x8cm and the triangles have 2 sides of 8cm and one of 11cm. I left 1,5cm extra around all the pieces.
.
The best is to cut all the pieces from the paper and then simply draw on the material
For the quilt like my one 4 rows and 5 columns you will need:
20 denim squares 16cm x 16cm (all the measures are without 1cm for sewing around)
80 denim squares 8cm x 8cm
160 denim triangles 8cm x 8cm x 11cm
160 beige triangles same measure as above
49 rectangles 32cm x 5cm
30 light blue squares 5cm x 5cm
I know, the amount of triangles is impressive, when I counted them I couldn´t believe!
Now the fun part (require a bit of room) to put all your main pieces and decide how to design your quilt.
where to locate the light and dark pieces so all look good together?
When you made your choices and are happy with the effect it´s a good idea to write the numbers on the other side of all the pieces. This way you will stick to the original design and the writing won´t be visible inside the quilt anyway.
Ahhhh decorations, decorations. Today almost whole day I spent making different things, including another wreath as a present for my mother-in-law (picture in the next post)
I´ve seen lately so many lovely D.I.Y Christmas trees around that I decided to make some myself - the Pinterest is sooo inspirational :) BTW my account is here: http://pinterest.com/harmonicday/
Here we go then - the instruction of making very simple little Christmas trees:
1. Most of the people use foam cones as a base, but I thought - what if I use a cardboard? It is thick enough to make a sturdy construction and at the same time you can easily pin decorations to it. The only obstacle was to roll it. But after a few minutes I learned how to do it :) The advantage of using cardboard is the possibility to make your tree as high and slim as you want.
Once you make your shape it is as easy as using scotch tape to hold it together.
2. For the next step you need pins and yarn. Pin the yarn close to the base and wrap around the shape pinning from time to time, working your way to the top.
3. Now you can use your imagination to accessorise your tree. I used little styrofoam baubles, berries, small cones and dry flowers. You can take off some of the pins you used to hold the yarn and repin them with accessories. Dry flowers don't need pins of course, they can be just tucked under the yarn.
And that´s all. The Christmas trees are ready. I made three with different height. Unfortunately I though a bit too late about making little holes and putting the lights inside, but I will do it next year for sure :)
I always liked wreaths. The problem is in most of the shops the wreaths are full of glitter, gold and daub.I really don´t like the "made in China" style.
That´s why after seeing lots of beautiful, inspirational wreaths online I decided to make my own.
These are simple steps to make wreath. My one is in traditional colours of the season, but you can make anything you want. :)
For the base I used woodbine branches, they bend easily and I didn´t even need to use anything to keep them together. Simple tight wraping one around another and tucking the lose ends between the tangles do the job perfectly.
When I decided the base is tick enough I wrapped a few branches of
cypress, the same way as before, to give it a green touch. I didn´t use a
lot of them, as I wanted to have space for baubles and pinecones
I used 2 colours of baubles and placed them on the base using green thread to make it less visible. The black baubles look very elegant together with my favourite deep burgundy colour.
After all of that the last step - pinecones. They need to have a bit of branch so it´s easy to tie them up to the base.
For the final touch I painted parts of the pinecones with white acrilic paint to imitate the snowy efect.
And that´s all. Simple and personal.
Much better than the mass production from the shops.
First of all, I´m sorry for such a long silence. It has been a busy and difficult time. Lot´s of complications was growing on my way and I had to dedicate my time to remove them. I wasn´t in the mood to post here.
Hopefully now the hard time is over and I will be able to visit you more often as well as share things in here.
In the last post I published before the long silence I said I wanted to change the profile of this blog. Instead of travel blog I would like to share here the things that I do, that inspire me, that means something.
Of course I will still share some trips, but as I always do lots of different things, I would like to show them in here too.
As Christmas time is coming I am busy making some decorations around the house.
Today I´m sharing one of them.
Very easy to make: I used
3 clay flowerpots (each cost only €0.50),
bit of white and burgundy fabrics - for the white woolly part I used sleeves of old jumper.
3 pinecones
glue and salt to make the effect of snow
bits of a decorative ribbon
bits of fabric to put inside to pots, so the pinecones are well fitted
tiny bits of cottonwool which I put in between the pinecone and the pot to make snowy effect.
Happy New Year everyone! I haven´t been here for AGES!
To be honest I kind of gave up on this blog. But now I am thinking to come back to it, with a slight change of its character though....I won´t write only about traveling and places that I have been into. I want to share more of my life - the recipes (as I love to cook), the books or films that inspired me and of course photos, photos, photos :) this definitely NOT gonna change :)
Hope even though it won´t be only traveling you still gonna like it :)
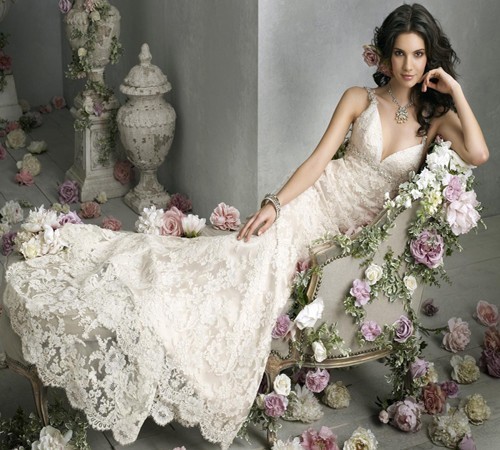
So for the first post on the slightly changed blog, I want to share the beautiful dresses I am looking at, as this year we are getting married. I am looking for a vintage dress although probably not as fancy as these here...Although they are SO GORGEOUS!
Sometimes I think that maybe short french vintage would be nice too:
And the dress that I like the most have the meaningful name "forget-me-not" and looks like that:
Well......All the women who got married know it is not an easy task :)
The most beautiful trip and the one I recall often has been our trip to Morroco. We were staying for a few days in Marrakesh which impressed me with intesity of colours, smells and sounds.
For Marrakesh I will dedicate another post but today I would like to write a few words and show you one of the most wonderful places I´ve seen - Sahara desert.
On the way to the desert we´ve seen quite unusual views for Morroco as it was raining for a long time and the rivers were very high.
We could see very woried people looking at the buildings not prepared at all for this kind of weather. Luckily just as we came the rain stopped. As I´ve been living in UK at that time I was laughing I brought a good weather from England :)
People living near Sahara called Berbers are completely different then those in Marrakesh. They are more kind and friendly.
The Berbers lived in north Africa long before the arrival of the Arabs, and their culture probably dates back more than 4,000 years. Berber states known as Mauritania and Numidia existed in classical times.
Today, there are substantial Berber populations in Morocco and Algeria, plus smaller numbers in Tunisia, Libya and Egypt. In Morocco, about 40% acknowledge a Berber identity, though many more have Berber ancestry.Berbers are identified primarily by language but also by traditional customs and culture – such as the distinctive music and dances. (http://www.al-bab.com/arab/background/berber.htm)
To be on the teritory of Sahara dessert you need to walk through Rissani Gate. It´s very beautiful although a bit strange, standing lonely in the company of low buildings which have completely different style.
In a short time we arrived to the point where our trip was taken over by Berbers and camels.
Looking at the face of the camel I don´t think he was very happy to see us :-D
We both decided to walk to the camp to have more possibilities of good shots and go by camels on the way back.Running around in the sand and trying to get a good composition wasnt easy at all. The camels were quite fast too and didn´t really want to pose. :0)
Desert was absolutely beautiful, especially towards the evening the colours of the sand and the sky made absolutely breathtaking composition.
I found some inhabitants too and had to be very careful to take a photo of them. Their dinner wasn´t very elegant, but well....if you live surrounded by sand you don´t have much choice I guess.
We arrived to the camp where we had fantastic, huge tangine for dinner made by our berberic hosts. We played some music and talked. After dinner we went for a walk on the dessert and it was magic. Me and Miguel separated from the rest of our little group and we sat on one of the hills. We were staying there quietly, watching huge moon hanging over dark and silent desert. I will never forget this feeling...
In the morning we sat on the camels and walk back through the sand. The place looked very different this time. Sunrise made the sand almost pink. I could hear the nature waking up. Suddenly I´ve seen little bird diving to the sand and flying up again several times. It looked like same strange dance purely from the joy that the day is here again.
I love the desert - contraryto appearances that it is only sand and the sky, I feel the strong hand of nature there. Nature which can´t be disstroyed by human. All the creatures there cherish live more and are happy to survive another day. Maybe that´s the reason why Berbers are more happy and friendly too...
The last part of the three different cultures and religions I would like to write about is Christianity. As I am catholic myself probably it is easier for me to distinguish different parts of the big church of Christians. The biggest representation of Christians in Jerusalem are Russian Orthodox, Greek Orthodox and Catholic Church.
Lots of pilgrims come to this town to follow the steps of Jesus on His last trip - from Olive Mountain all the way to Golgotha (called as well Calvary Hill). Eventhough almost all Via Dolorosa is situated in the Muslim Quarter you can see many groups of pilgrims of Christians from many countries carrying the big cross, singing and praying on the traditional 14 stations of the Cross. All the way of Via Dolorosa in the muslims shops you can see many items which are dedicated to the christian customers.
In Christian Quarter you can see many monks and priests who came here with their little groups from the local churches around the world.
Via Dolorosa ends at the Church of the Holy Sepulchre in the Christian Quarter
Immediately inside the entrance to the church is the Stone of Unction, which commemorates the preparation of Jesus' body for burial. This limestone slab dates from 1808, when the prior 12th-century slab was destroyed. Ownership of this site has varied over the centuries, but it now belongs to the four main sects: the opulent lamps that hang over the stone slab are contributed by Armenians, Copts, Greeks and Latins.
You can see many people meditating and praying by the stone
Many pilgrims - especially Russian Orthodox come with big bags full of icons, candels, crosses, bottles of water and each of these items is carefully placed on the stone for blessing. I´ve seen even mothers putting on the stone their little babies.
For me the most beautiful and fascinating is the Greek part of the Church with the atmosphere created by lamps and of course with Greek priests who look really devoted to their mission.
Very impressive are as well the ancient crosses carved along the stairs to the Chapel of St. Helen
by centuries of pilgrims. Normally people don´t even notice them. Just when we started to take photos some pilgrims stoped and were taking photos too.
It´s a shame that in this holy place it is very difficult to feel the spiritual atmosphere. There is so many people turists as well as pilgrims that whole place feels like museum rather then a church. The only way for me to really feel like I should feel in this place was to come there in the evening. As Jerusalem starts to empty it´s streets about 6pm - there is not so many people who go to the Old City after all the shops are closed. Beeing almost alone in the church for us was really special.